

Non-Import Custom Disclosures Tab
This tab enables you to specify up to twenty additional disclosures for the currently selected entity. It is accessed by clicking the Non-Import Custom Disclosures tab under the toolbar.
Each disclosure contains two tabs:
- Standard Table
- Non-Standard Table
Each tab contains a Group and Company version of the same table. The table available to edit depends on the type of financial statements required and the selection made on the Summary tab within the General dialog.
The Note Description / Title field found on the Standard Table tab will not appear in the report and is solely for identifying the disclosure on the Non-Import Custom Disclosures tab.
You will find tables have been created in the report to link to these new disclosures. To include a table in your report you will need to place a tick beside the note and table linked to the data you have entered:

- Adding New Rows
- New rows can be added to both the Standard and Non-Standard Tables:
Click the New button to add a row.

Use the Arrows to reorder the rows and the Delete button to remove a row.
- Adding New Columns
- New columns can be added to the Non-Standard Tables:
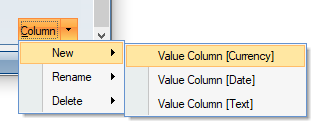
Click the Column button, then the New button and select the type of column to add.
Using the Column button you can also rename and delete any columns.
Any new columns added will not automatically appear in the report and will need to be added manually.
- Adding Additional Columns In Your Report Tables
- To include a new column created in a Non-Standard Table on the Non-Import Custom Disclosures tab:
- Select the Reports tab.
- On the Reports List tab, highlight the report and click Open.
- On the Report Structure tab, expand the [FY] Non-Import [Custom Disclosures] folder.
- Next expand the Note folder, then the Non-Standard Tablefolder and finally expand either the Non-Standard Table - Balance Sheet or the Non-Standard Table - Profit & Lossfolder.
- Right-click the table to amend, e.g. Non-Standard Table - Current Period and select View.
- On the report, double-click over the table to launch the smart-table designer and edit the table within the Design Smart Table window.
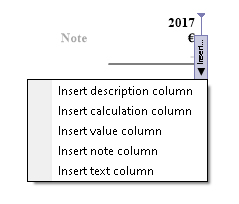
- Hover the mouse just before or after the existing column, depending where you want to insert the new column, and an Insert button should appear.
- Click this then select Insert value column.
- Under the Column contents tab you can rename the column and add a heading by clicking the ellipses button beside that field. On the Column options tab you amend the column width and style used.
- To include the data entered on the disclosure tab, click on the Financial Period Data tab and in the window to the left, drill-down until you have highlighted the new column (in this example named "NEW COLUMN").
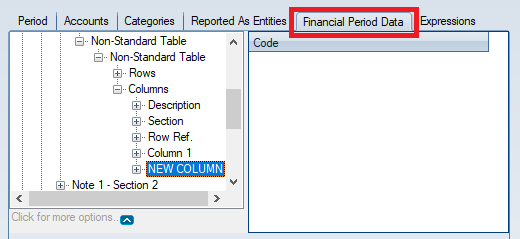
- Click the New button so it appears in the window to the right, then click the OK button to return to the Design Smart Table window. The new column should now be included in the table.
- Click OK again to return to the report.